Showing posts with label August Crop Kit. Show all posts

Tuesday, 29 August 2017

AUGUST CROP KIT - Lifes a Beach & Life is Sweet!!

Hello there, 
How is your day going? The days are flying by and soon we will be into Spring..  The warmer days and the colors of Spring make Spring one of my favourite times of the year!
However, I received some gorgeous papers that took my winter blues away in the form of the AUGUST CROP KIT which is a one off purchase which you can find in the SHOP AND CROP SCRAPBOOKING STORE HERE!!!  This is an amazing kit with colorful summery papers and lots of die cuts and embellishments in the ephemera pack to choose from.  I have two layouts to share with you and the first one has some simple instructions for you to create a layout too.

Everything I used is in the kit except for some old cardboard that I put under my photo for some dimension..  or foam tape would work too..

This is the layout that I created.

Life's a beach..


The photo I have used was taken at the Warwick Resort Fiji, so any of your beach holiday or travel photos would be fabulous for this layout..

Cut the strip off Item#2838 Cabana. I will be making a frame from this paper. Measure 6 cms around on each side making the marks on the pink stripey side, I am using the leaf side of this paper.

Using a craft knife or a box cutter cut carefully along the lines to create the frame for the layout. The middle section can be kept for another project.


Lightly distress and ink the inside edges of the frame.

I am using the Item #2341 Pool Party as the base of the frame, the green side. So to use the paper efficiently  I will cut out the outside and this will give  a frame to use on another layout. So I will do what I did before and measure 5cms around the Item#2341 Pool Party on the stripey side. Just to test that it will fit under the leaf frame lay the Pool Party paper under the leaf frame and make sure I can't see any marked lines.


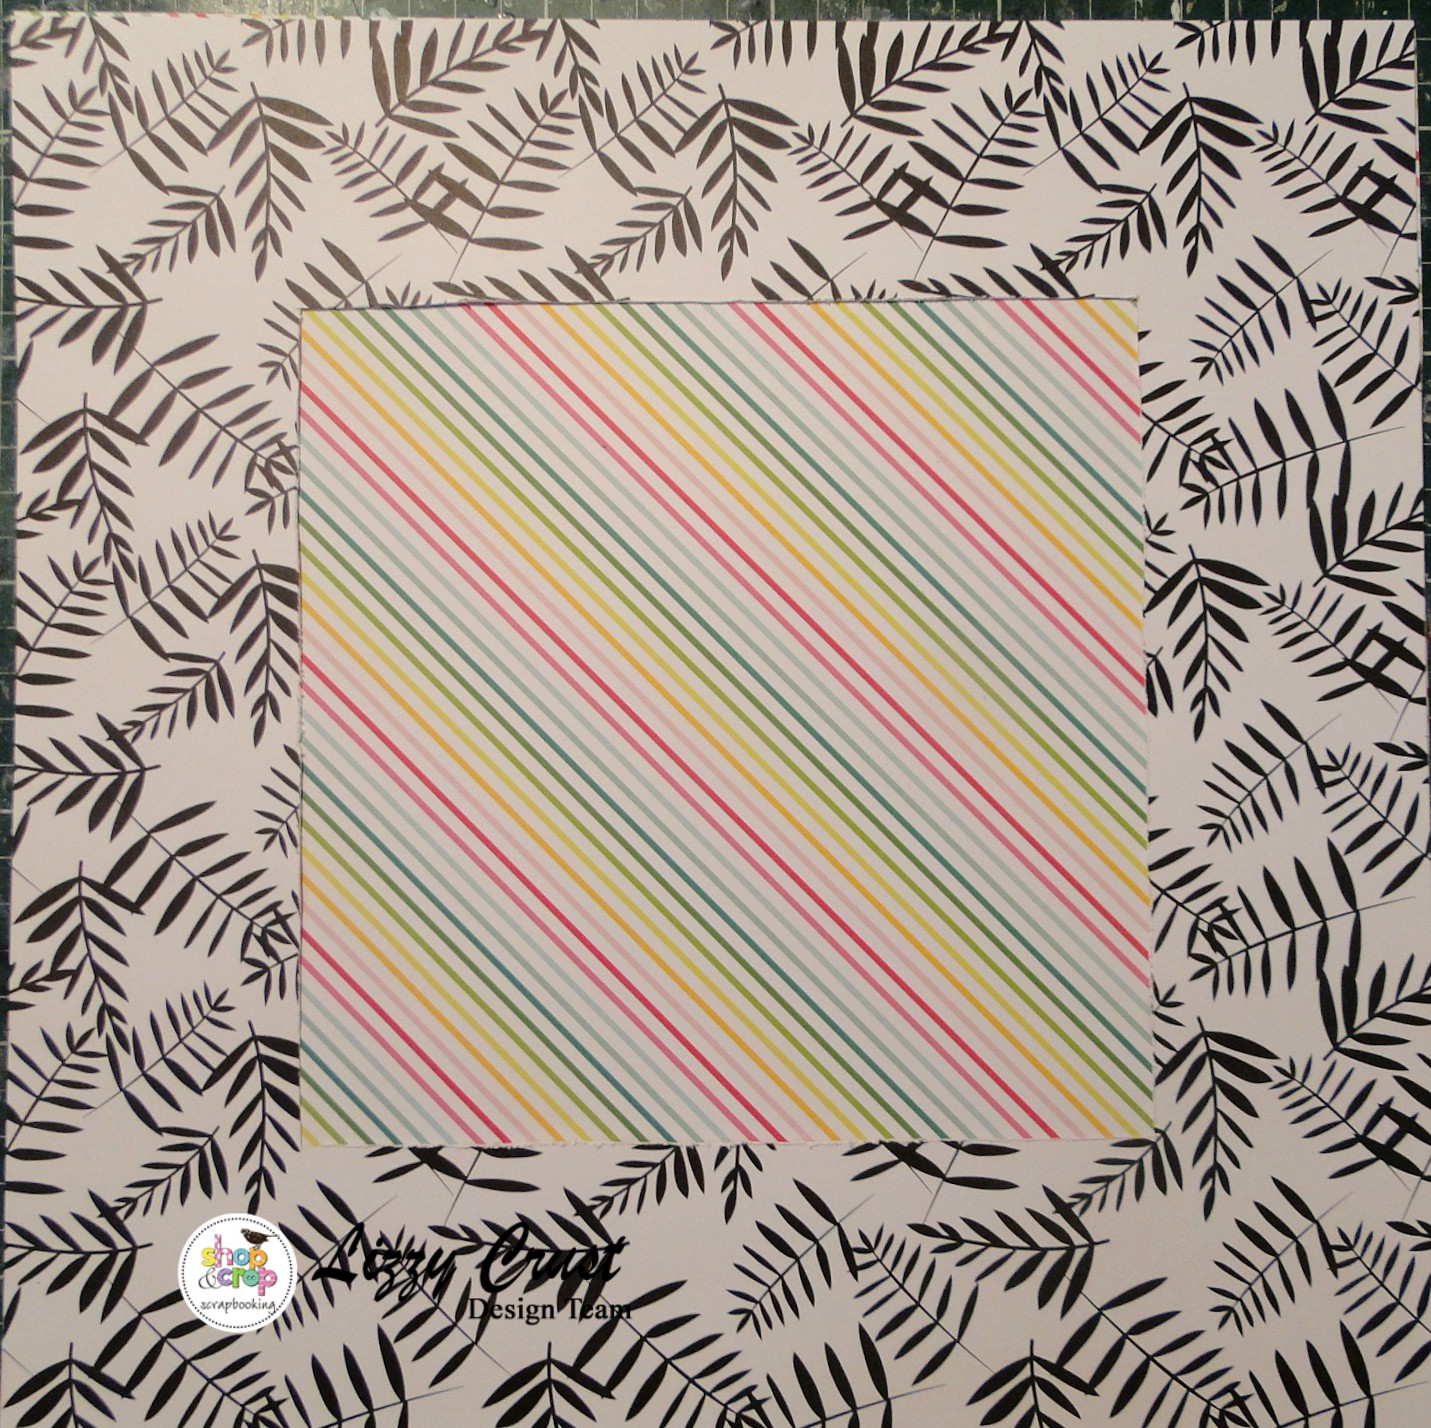
Cut out carefully, and I am using the green side of the paper on this layout.
Run some thin double sided tape around the edge of the green paper.


Adhere under the frame. This is what the base will looked like.

I adhered some old cardboard under my photo and this was placed in the middle of my page.  I cut the large gold dot flower in half to place half on the top of my photo and the other half on the bottom right of my photo. I cut a strip of hessian 15 cms long and then in half width ways..  Pull some strands of hessian to add a distressed look. Tuck the hessian slightly under the photo along the bottom of the photo. Cut approx 8 cms of the string for each tag and add to the tags.  I added some journalling to the journal spot as well as a shell chipboard and also used a strand of hessian and made a bow. Add some banners on the side, a hibiscus flower and leaves on the right bottom of your photo, and some chipboard around your photo..

And some close ups to show details.


And a reminder of the finished layout..

Life's a beach.

The second layout I have created using this fabulous Kit uses the green frame left over from the first layout which is put on a piece of white cardstock from the Kit. I cut 4 rectangle pieces of paper from Item#2839 Summer Fun 4cms by 18cms and used two of each side. These 4 pieces of paper were placed evenly spaced in the middle of the page and then my photo was placed in the centre of the  layout. The layout  was embellished using die cuts and  items from the ephemera pack.  The products that I used that were not in the Kit was glitter glue, a flower punch, foam tape, an edge punch and a black marker.

Some closer views.
A cluster of embellishments..

Is that Flamingo cute or what!!?? The flowers were created using a flower punch and papers from Item#2837 Feeling Good.

Check out that cool ribbon!!!

Life is sweet!
I have used a black marker pen to outline the edges of the papers to make them stand out more. Such summery and pretty papers in this kit..  There is still more product left and I will share with you what else I create in my next blog post..  You can purchase this wonderful Kit at the SHOP AND CROP SCRAPBOOKING SHOP - HERE!!! And remember to pop the code LC5 on your order for a sweet discount of $5.00.

Have a happy scrappy day!


Monday, 28 August 2017

'Summer Loving' By Elisa Ablett

Hi everyone,


Elisa here from the design team back with a simple tutorial using the new Tim Holtz Distress Ink Oxides to make a mixed media layout using the leftovers from the August Crop Kit and a few things from my stash.

The Crop kit is chock full of amazing papers and embellishments and so far I have made 4 layouts out of it with leftovers !

If you are after Oxide inkpads or a Crop Kit order through
Kylie at the shop and use the code EA5 to receive a discount on me 😀😀

Kylie and I have come up with a special bundle deal for customers - Buy all 12 colours in series 1 and series 2 colour releases for a special price and receive an even further discount if you use the code EA5 just message Shop and Crop Scrapbooking for the details!!!

Here is my layout, a mixed media beach inspired layout.


Let's Get on with the tutorial!

I picked these lovely four beachy colours and grabbed my trusty water spray bottle to begin.

If you are unsure what the Oxide inkpads are and what makes them so crazy special, this is a description coming from Ranger and Tim Holtz -

"Tim Holtz Distress Oxide Ink Pads are water-reactive dye & pigment ink fusion that creates an oxidized effect when sprayed with water. Use with stamps, stencils, and direct to surface. Blend using Ink Blending Tools and Foam. Re-ink using Distress Oxide Reinkers"


Because they have pigment ink blended in with them they will stamp with a fine image, they are opaque so will show up perfectly on a dark surface, you can also layer the colours on top of each other and they still retain the colours and do not turn into brown smoosh. And the best thing is they still react with water like the Distress Ink pads.

I will be showing you a quick and simple tutorial on how to use these wonderful inkpads and how to apply them to a mixed media layout...


Step 1 - Grab your ink pad and smoosh it or wipe it onto your mat (special crafters mat that can be wiped over) spray the colour with water liberally to create large droplets


Step 2 - Turn a piece of mixed media cardstock over the colour on your sheet and place it on the colour. Now to get the droplets you can just pull the sheet back up without rubbing the back of the sheet with your hand or you can rub the back of the sheet to get a different look. Pull the sheet off the colour and dry with a heat gun.


Step 3 - While you are drying with your heatgun, grab a water spray bottle - the distress spray bottle is the best for this job as it releases rather large drops and spray onto your sheet over the colour and you will get this lovely oxidised droplet effect. 


Step 4 - After your first layer of colour, you can now add layer after layer using the same technique!! you will get a multi colour effect with lovely droplets and crazy oxide effect.


Step 5 - At the end you can also add another technique using a fan brush. Smoosh your colour onto your mat, add the water and then using the brush instead, dip it into the colour and tap generous droplets of colour onto your page and dry with a heatgun.

Below is a few examples of the end result of these techniques! perfect to use on a beach inspired layout ....right ??


Here is a few photos on how I incorporated these techniques on my layout.


Adding background colour to my page using the smooshing on the mat technique.


Adding some droplets of Antique Linen Oxide Ink pad to my page.


Use the inkpads to cover wood veneer or chipboard and use embellishments like DIY hearts from Charms Creations to mop up the colour on your mat and they will match your layout!!


I also used the technique on a couple of die cut square frames, which is a different and unique way of colouring and adding them to your page.


Add some stamping over your frames...


And here are some close ups of the finer details 


Well that's it from me today, i hope you have enjoyed the tutorial and insight into how you can incorporate simple yet effective techniques into your layouts.


Hugs 

Elisa xx


Monday, 14 August 2017

'August 2017 Crop Kit Alternatives' by Elisa Ablett

Hi everyone,

Elisa here from the design team for Shop and Crop Scrapbooking with a different take on the August 2017 crop kit 

Here is the link to the August Crop Kit on the website, it includes papers and bit and pieces from the Hello Sunshine collection from Fancy Pants, ephemera pack, tag and labels and gorgeous lemon thickers.


Now if you are a subscriber you would have received your awesome kit by now with the instructions to create your layouts. I am lucky enough to receive one as well so I can show you a few alternative pages that you can make with the kit AND a few products from your stash!

My first layout is titled - Walking on Sunshine


I used Colour Blast Shimmer Cube in 'Sunshine' and Colour Blast Shimmer Spray in Lipstick to create a few coloured splatters on the background. Then some stamping over the top using a set of stamps by Prima - Ink and Layer in Flora and a lovely script stamp.

Here are some close ups of the layout.


A banner and layering!


Flower cluster to draw the eye to the photo.

💙💚💛💜

And here is my second layout - Soak up the Sun

More of a mixed media layout using the kit contents plus extras from my stash including black Dylusion spray, yellow acrylic spray by Marabu Art and Sunshine Colour Blast Shimmer Cube. Also I added a hand made sun and a gorgeous cloud embellishment from Charms Creations.


Here are some close ups - 


Here are some of the products used to complete these layouts -

Prima -Ink N Layer-Ink N Layer - Fragrant Flora-12 pcs

Colour Shimmer Cube - Sunshine


Colour Blast Shimmer Spray-- Lipstick


Thats it from me today, 

If you are looking to treat yourself, don't forget to have a look at our kit subscription options on the website, if you are already a subscriber to our wonderful kits stay tuned because the design team will be posting their takes on each of the kits through the month after each kit release....


We want you to know how to get the most out of each of your kits!!

hugs

Elisa xx