Showing posts with label stamps. Show all posts

Friday, 27 October 2017

Blossum, Bloom, Grow

Hello, Deena here with you today.
 
Last months mixed media kit was designed by the super talented Fiona Paltridge, and I got to play with it. Included in the kit were the Faber-Castell colour fizz tablets. There are four different colours to play with but I only used three. I do still have some of each colour left to play with at another time.
 

Normally I would gesso my canvas before I start, but this time I didn't. Using my versamark (not in kit) I stamped the gorgeous prima floral stamp onto my canvas. Using white embossing powder (not included) I created a resist on the canvas. 

Close up view of the embossing as it is a little hard to see in the photo above, white on white is not great until you add colour then it comes alive.

I wet my canvas lightly and then placed the fizz tablet on to the canvas. I decided that it was better to put it on my messy mat and keep it wet that way and use a paint brush to add the colour.

This is the dried canvas, I put down a layer of colour and dried it with my heat gun. Once dried to add a little interest to the back ground using my brush I splash some colour.

Using the two smaller stamps and the cardstock provided I stamped the images and then again heat embossed with white.

Close up view of some of the dried flowers.


 This next step is once of my favourite techniques. Fussy cutting, I find it really relaxing.
 
Once I finished fussy cutting I arranged my flowers onto the back ground and added the three words included in the kit.
 
If you would like to make a purchase in the shop please use the code DO5 for a $5 reduction on your purchases.
 
Our kits are available as once off purchase but to make sure that you never miss out you can subscribe please follow the link to find out more about our kits.
 
Happy Creating


Saturday, 26 August 2017

Exclusive Stamping....4 ways by Sarah Rosse

Hello crafty friends, Sarah here with a quick technique based blog post using the awesome graffitti stamp, exclusively found only in the June Mixed Media kit. This kit and stamp was designed by the gorgeous Elisa Ablett! How lucky are we to have her on the design team. As soon as I spied the graffitti stamp, I knew I just had to have it. The range of Shop and Crop once off kits can be purchased online by clicking here.

So here are four ways you can use this graffiti stamp to create a cool background. This stamp is ideal for multiple prints side by side, as Elisa has done in her mixed media kit. You could use these techniques to make a card background or for a scrapbooking layout or pocket page. Everything you will need to try these out is pictured above - a heat gun, stamping block, ink, embossing powder (I used clear and gold) and paint. The Mixed Media kit comes with three small bottles of paint which are ideal.

First technique is simply stamping with ink. Here I have stamped with black StazOn ink. You could however use any colour ink you like. I think multi coloured or an ombre inked look would look fantastic.
Secondly, I then added some clear embossing powder over the black ink while it was still wet and heated it with my heat gun. Shop and Crop have a wide range of embossing powders that can be found here. As you can see in the photo below, the embossing powder gives a shiny, slightly raised finish to the stamped image.
Continuning on with my love of embossing powders, this time I have applied VersaMark, stamped and applied gold embossing powder. This is then heated with a heat gun and wow, the shine is gorgeous! You can just imagine this on a wider background - lots of bling!
Lastly is stamping with paint....yes, it sounds messy and it can get that way, but the little bottles of paint provided in the Mixed Media Kit are ideal for this technique. The tips of the bottles make application to a small surface, such as a stamp, easy to do.
The lovely thing about paint is that you somewhat control where you place it. I say 'somewhat' because I find it does it's own thing and can move a little when stamping, depending on how much paint you put on the stamp. As you can see pictured above, I have used two colours, but imagine stamping with the colours of the rainbow! Could be alot of fun for a layout background.
Thankyou for joining me for today's technique - I look forward to seeing how you use your stamps to create funky backgrounds. Remember though, if you do want this exclusive stamp - be sure to order your Mixed Media Kit today and use the code SR5 for a $5 discount at the checkout!

Tuesday, 15 August 2017

Mixed Media Kit - ALL BOY and August Challenge Tic Tac Toe!

Hello there,
Here we are in the 8th month and August is flying by...  I hope the cooler days have meant some inside scrapping time with your SHOP AND CROP KITS which are ready when you are to do some creating!!

I was sent a fabulous Mixed Media Kit/ Expo Kit no2 which is just perfect for your little man with products that are such fun to use.

This gorgeous layout was created by the talented Elisa Ablett.

 As I created with this kit, I thought I would also share the instructions with you to show you some other ways you can create with this fun kit.

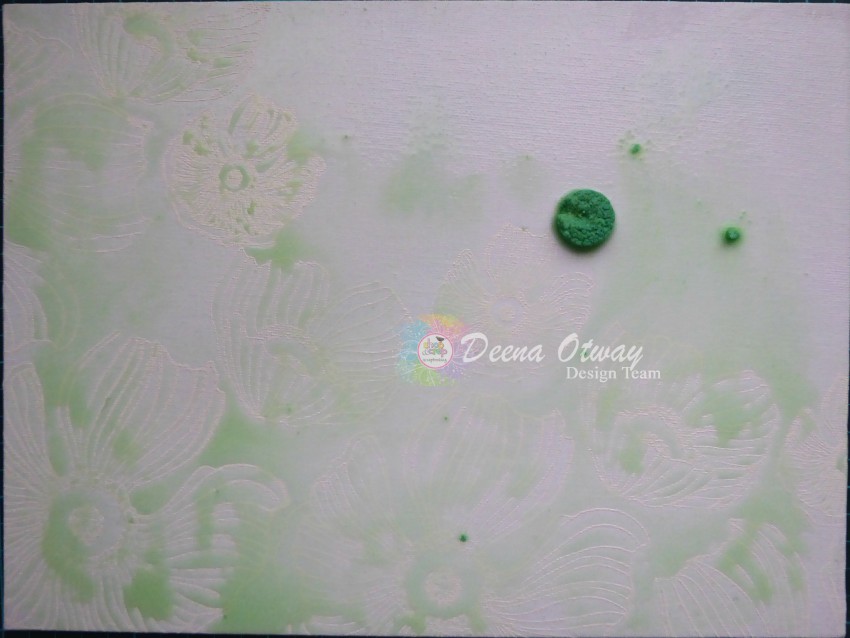
I started by finding a photo which I cut down from 10by15cm to 8by11cm but you can use a 10by15cm photo if you like. I distressed the edges of the photo and matt it on the smaller white paper in the kit. I also used some old cardboard to add some dimension/lift to the photo, foam tape or foam dots would work too.With that left over paper that you cut a piece out of for your photo matt we are going to add some color to that to use on our layout. Using the mixed media products from the kit we are going to create a random pattern on the paper.. I dropped some Teal color in drops on the paper and then swiped it across my page with an old toothbrush.  I then watered down some black gesso and used a lid from an empty washing liquid bottle and stamped the black gesso using both ends making messy dots and circles.  I also made some splats and drops with the black gesso - the messier the better I think!! I let all this dry and then I made some wriggly lines with the green paint and then watered down some of the green and used the base of the lid to stamp some circles and let this all dry..
This is what my paper looked like..

and a close up.
There are no rules for this, just use what you have on hand and have fun!!

Meanwhile as the paper dried I took an assortment of chipboard and painted them with the black gesso, the watered down green paint and Teal paint..

Set these side to dry while we begin to add some stamping and stencilling to the base cardstock for our layout.
With the stamp, I took the stamp to the ink pad and randomly stamped on my page..  If you dont mount the stamp on the acrylic block it will have an arty look rather than a square look on the back ground..  I added some texture paste to some black gesso and added some dots on the back ground using the stencil from the kit. It is always better to do less at the start, you can always add more later.. (which I did!!) And remember to clean your stamps and stencil immediately after use with a baby wipe.


 I planned to place my photo in the middle section of my page.. but you can also put the photo to one side slightly more if you like.. that works well too..

Going back to the paper we painted, cut out strips about 1cm wide, but dont measure and it doesn't matter if some are a bit fatter than others..

(OOO excuse my dirty scrapping mat!!!!) This is what they will look like! Take your base and lay the strips on your page until you are happy with how they look..you may cut some to have the different lengths,  overlapping the edges slightly!


Using a good glue adhesive glue down the paper strips..

a close up..

 At this point I decided to add some more stamping and some more stencilled dots.

Now back to the chipboard!! Take the circle which I painted with the teal and cut it into two pieces with one piece just a bit bigger than the other.


Cut the circle chipboard into pieces as shown.


Cut 10cms of the mesh and cut 4 strips from that and place randomly on the paper strips on your back ground. Now we will assemble the layout!! Place one circle piece on each side, with the slightly larger circle piece on the right side, and the larger circle chipboard pieces on either side of the photo with a smaller piece on top of the photo.


Using the chipboard pieces that were previously painted place  on your page layering the arrows and adding a little journalling in a space about your photo..

My completed layout..

All Boy!

and some closer views.


Such a fun kit and such a fun page for a photo of your little man!! You can get this kit in the Store HERE!!!

Oh and there were a few chipboard pieces and paper strips that I painted and didnt use so those leftovers were used to make a card adding some stamping and mesh strips.


And have you seen this months challenge for Shop and Crop Scrapbooking on the BLOG??? It is a fantastic Tic Tac Toe that looks like..

You can choose three things to use in a straight line and I chose to use the middle line, Stencil Cardstock and Ink..

a closer views..
The back ground using stamps and ink and a stencil and texture paste. I also sprayed a little mist on the back ground too..

And my layout..


You can put your layout up on the Facebook page HERE!!!

Thank you for reading this long post, I hope you have found some fresh inspiration to use in your creating..
You can find that fabulous kit in the shop HERE!!! dont forget to use the code LC5 for a $5.00 discount!!
Until next time.. happy creating!


Monday, 8 May 2017

Tic Tac Toe May Challenge

Hello crafty friends, Sarah with you today - feeling so inspired by the May Tic Tac Toe challenge that I have two layouts for you! The first one, as pictured above uses a red and white striped paper bag (from D-lish Scraps), patterned paper (some of the last of my Crate Paper Cool Kid collection available in store here) and cardstock (from my stash). Let's have a look at the challenge set by Shop and Crop...
For this layout I created the background smearing on Dylusions paints in Postbox Red and Campso Teal with a palette knife. The range of Dylusions paints is available in store here. I left this overnight to dry as I tend to be a bit heavy handed with paints! I then used some stamps from my stash to add a little more background interest. The Shop and Crop online store have a great range of stamps, particularly mixed media ones.

I used the paper bag in this layout as a pocket to hold a large tag. I used the small piece of vellum I had left over from the Cool Kid collection to cover the tag and wrote on the back some points about my son at the age of 3 that I wanted to remember - his favourite foods, traits about him I love, what he calls himself etc. The photo is layered on Cool Kid patterned papers and stickers from this collection were used as embellishments. That cute handmade heart embellie is from Charms Creations. Let's take a closer look...
Now for the second project, a Planner Page layout. This is a Basic Planner Kit from Scrapper's Delights. I am pleased to have been offered a position on their Planner Design team. For more information about setting up and decorating your own planner, pop on over to their website by clicking here. I designed this layout also inline with in the Tic Tac Toe challenge, I used cardstock (300gsm cardstock that the planner page was printed on), stamps and embossing powder (gold from Stampin Up).
The background of the planner pages were completed using distress ink and the 'smoosching' technique. The range of distress inks can be purchased instore here. The stamps used with the gold embossing are the Kaisercraft Captured Moments Calendar stamps - also instore here. The day and date stamps are stamped with black ink with the Echo Park Paper Co Through the Year Calendar stamp that is also available in store here. The cute bear stamps are the 'Honey Bears' by The Ton. Lets take a closer look...
Whilst I have never really been in to 'planning' in the creative sense, I am using this planner to capture my Design Team commitments and a few photos of my children week to week. For more planner layouts, please see my blog here. I like to include reminders of everyday chores, appointments, events etc - all in a pretty format that is alot of fun to design and create. Lets take one last look at those cute bears - they are stamped in black ink, embossed with clear embossing powder and coloured using Zig Clean Colour real brush markers.
I hope you enjoyed these projects and the versatility in creating projects with the May Tic Tac Toe challenge. Until next time...