Showing posts with label Canvas. Show all posts

Thursday, 22 February 2018

Be You

Good Morning
 
Today on the blog I am sharing a mixed media canvas that I created using one of the papers from the January Crop Kit.
 
 
From the piece of scrapbooking paper I fussy cut the circles, then using dimension tape I created the three layered circles.
 
To start the canvas I covered it with a layer of gesso creating texture as I went, no that you can actually see it in the finished photo.
 
The next step is to add even more texture, find a stencil and your texture paste then go.
 
To add colour to the background I used dylusion sprays white linen and vibrant turquoise and water.
 
I made sure that I dried the sprays completely and then activate them again with water. While the water was wet I rolled my roll of paper towel over the top to remove some of the colour and create this mottle effect.
 
Once the canvas was completely dry I drew on my stems and leaves and added the words.
 
Don't forget to visit Shop and Crop Scrapbooking for all your kit needs and some fantastic bundle deals.
Happy Creating
 

Monday, 4 December 2017

Little Lindy Try-Me Kit

Hello

Today I want to share with you a canvas tutorial and how I used Little Lindy Try-Me Kit from Lindy's Stamp Gang. Included in the pack was a Magical - tiffanylou's blu, 2 starbursts - crème brulee cream and tiffanylou blue and a moon shadow mist - van dyke sepia. Lindy's products have to been one of my favourite things to use. Just a tip to remember, they are water reactive so what every wet substance you use over the top of them it will react with the lindy's product.
 
This is what I created
 
I started off with a canvas that I found in my stash, the dimensions are 15.5 x 15.5 cm by 3.5 cm in height. Then using gesso I put a really, really thick layer of it all over my canvas (including the sides). This layer is not smooth by any means. I love texture and I was getting texture even if it took days to dry. Before it did dry I found some thread, not actually sure what it was, again just in my stash and wrapped it around and around and around my canvas in all directions, make sure that I pulled it tight so it was embedded into the gesso. The thread was not going anywhere but once the gesso was dry I tied off the two ends. To incorporate the thread a little bit more I put more gesso over the string so that it didn't look like it was just sitting there.


Here is a close up view
 
I have to admit this canvas has been sitting on my desk in this unfinished state since January. Yes you read that right. Way back in January I had this great idea of creating a canvas this way, so I did. Then it just didn't work the way I wanted it too. It wasn't until I got my design team package from Kylie and I saw what was in it that a new idea started to form and one that I knew was going to work.
 
The next step in creating the canvas was adding the colour

 
This close up shows the shimmer, it looks so different from above but this was sitting in full sunlight streaming through my window This gold shimmer came from the crème burlee cream so pretty.
 
I decided that I had lost some of the dimension and I needed to get that back. With my palette knife I added white gesso to the top of the thread adding dimension and contrast.
 
Finally I am happy with the canvas now I needed to work on the embellishments. I am using chipboard that was in my design team package and I decided to heat emboss it. When I am heat embossing chipboard I always do the process twice because it give a much nicer finish, the photos below show the difference between one coat (first photo) and two coats (second photo)
 
 I glued the chipboard to my canvas and added the little quote down the bottom and it was finished.

Products used from the Shop:
Dusty Attic Chipboard - foliage #5
 
Happy Creating
 

Sunday, 19 November 2017

Patina Effect Paste

Hello,
Deena here today and I am going to share a tutorial with you.
 
Have you used the Patina Effect Paste by Finnabair? I hadn't either until I got to play with it for this tutorial, although I had been eyeing it off. I did actually watch a couple of youtube videos to see how it was applied and what order the three different mediums. After watching them I ended up applying them the way Finnabair did it as it didn't really seem to matter, brass, then the mint-green and blue together. Make sure that before you add the mint-green and blue that the brass is completely dry as they turn ugly if you don't. I am not sure that I needed to put the brass first but that's ok.
 
I will show you the finished canvas and then share with you my steps.
 
The substrate I used is a canvas board which I covered in a layer of gesso. Once the gesso was dry I used texture paste and a stencil to get my canvas started. While the texture paste was still wet I push my chipboard (which I painted with gesso earlier) into the paste. I wasn't sure if this would hold so I did put some glue on the back. I let that dry natural as I didn't want the chipboard to warp from the heat of my heat gun.
 
 On the edges of my canvas I did not want my stencil to be perfect so with my palette knife I gently spread the texture paste out.
 
Using another stencil and texture paste I add some more texture this time adding it not only to my canvas but also the chipboard.
 
Next was the stamping, I didn't want the stamping to be the focal point but just another layer in my process. I also added the chipboard frame, sewing cotton and flowers. The stamping seems over the top but you wont see much of it after the next step. I also added the heart shaped chipboard.
 
In this next step I added gesso over the top of my canvas to send the stamping into the background and also to turn the chipboard frame and heart from brown to white. While this was still wet I went crazy with my white crackle paste. I just love texture and needed more.
As you can see the stamping has almost disappeared completely but it is showing through in some places.
 
Below are some close up photos of the dry crackle paste.
 
The final step in creating my canvas was using the patina effect paste
 
Products used from the Shop
Patina Effect Paste
Archival Ink - Jet Black
Kaisercraft Stamp - Script
Canvas Board
The Crafters Workshop Stencil 12x12 - Hourglass
Cocoa Vanilla - Flowers
 
Happy Creating
 

Friday, 27 October 2017

Blossum, Bloom, Grow

Hello, Deena here with you today.
 
Last months mixed media kit was designed by the super talented Fiona Paltridge, and I got to play with it. Included in the kit were the Faber-Castell colour fizz tablets. There are four different colours to play with but I only used three. I do still have some of each colour left to play with at another time.
 

Normally I would gesso my canvas before I start, but this time I didn't. Using my versamark (not in kit) I stamped the gorgeous prima floral stamp onto my canvas. Using white embossing powder (not included) I created a resist on the canvas. 

Close up view of the embossing as it is a little hard to see in the photo above, white on white is not great until you add colour then it comes alive.

I wet my canvas lightly and then placed the fizz tablet on to the canvas. I decided that it was better to put it on my messy mat and keep it wet that way and use a paint brush to add the colour.

This is the dried canvas, I put down a layer of colour and dried it with my heat gun. Once dried to add a little interest to the back ground using my brush I splash some colour.

Using the two smaller stamps and the cardstock provided I stamped the images and then again heat embossed with white.

Close up view of some of the dried flowers.


 This next step is once of my favourite techniques. Fussy cutting, I find it really relaxing.
 
Once I finished fussy cutting I arranged my flowers onto the back ground and added the three words included in the kit.
 
If you would like to make a purchase in the shop please use the code DO5 for a $5 reduction on your purchases.
 
Our kits are available as once off purchase but to make sure that you never miss out you can subscribe please follow the link to find out more about our kits.
 
Happy Creating


Saturday, 23 September 2017

Paperific Expo Melbourne


Hello,
Deena here with you today.
 
I cannot believe that it was a month ago that I was at Paperific here in Melbourne. I hadn't attend a show in years certainly not since it has been at the Royal Melbourne Show Grounds. This experience was totally different as I was actually working. If you call standing around talking to lots of friendly people and sitting and getting messy work, then yes I was working. When it came to saying goodbye I didn't want to leave, I had an amazing time meeting and working sided by side with Kylie and Darryl who own and run Shop and Crop Scrapbooking and also having a blast with fellow design team member Donna. I love making cards and I will keep doing it but watching Donna create was the next level. You can find the cards Donna made at Paperific HERE.
 
So what did I get to play with? I played with Expo Kit No. 4. which was designed by another design team member, the talented and gorgeous Elisa.


Instead of creating a layout a created a mixed media canvas (canvas not included in kit)
To start the canvas I spread a layer of gesso unevenly over the surface of the canvas. The reason for this was because I wanted to create texture (I love texture and layers) and I wanted to stamp into the wet gesso to create more texture.
 
I dried the gesso with a heat gun then using the same stamp that I stamped into the gesso with I used a waterproof black ink to stamp the image. Because the surface of the gesso was a little shiny I did hit the ink with a heat gun to make it was completely dry.
 
When I first started this canvas I really had no idea what I was going to do once I had completed the background. So at this point I had to stop and think. I had these amazing chipboard pieces that I really had to use. I found a black paint so I could colour the chipboard and set it aside to dry.
 
While the chipboard was drying, I added colour to my background. I used the dylusion spray that was in the kit and added water to make it run. You want to make sure that the colour spreads across you canvas, so that it brings the texture you have created to life. If you add too much water then add more colour and vice versa.

Once happy with the colour added I dry the canvas with a heat gun. Also included in the kit was a gold mousse, that's so versatile. I rubbed it over the background to show more texture, I rubbed it on the chipboard circles. I also added it to the row of triangle but I added it with a palette knife so it was thick and lump.
 
After gluing the chipboard pieces to the canvas, I added black paint splatters. I couldn't find a paint brush at the time so I improvised and used my palette knife. Love the result.
 
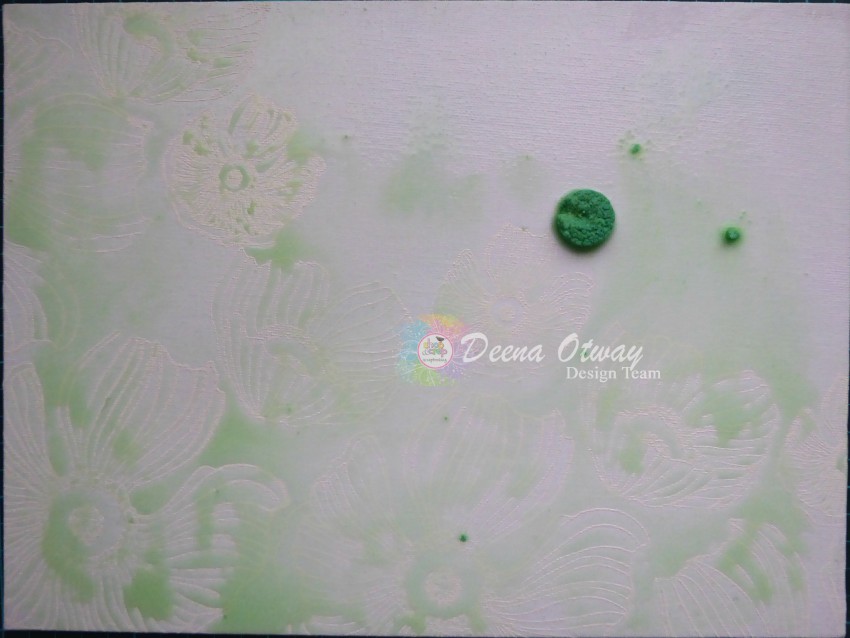
I also created a couple of backgrounds.


These were done on a pieces of mixed media paper, the can be cut up to be used in a layout, another canvas, as an art journal page or even on cards.

Happy Creating
 

Thursday, 17 August 2017

Day Dream

Good Morning
 
This morning I have a canvas I created using one of the kits from the Brisbane expo. Expo Kit - No. 8 which was designed by the very talented Elisa. I am going to share with you my process in a photographic tutorial.
 
The first step in my process was to prepare my canvas (not included in kit). I am not sure how many layers of gesso I put on the canvas but I wanted to create a lot of texture.
 
I did help the gesso to dry with my heat gun but then I let it dry naturally overnight because of the thickness of the gesso I didn't know if all the layers were dry. Once the canvas had sat overnight, I attached my stamp to my stamp block with double sided tape and then using my black ink (not included in kit) I stamped over the surface of the canvas. None of the stampings were perfect that's because I was stamping on a canvas but that was okay with me.
 
 
I needed to cover up some of the stamping as it was just too much but I needed the coverage of the stamped images to make sure that I was adding another layer to peak through. Using my palette knife I scraped the gesso across the surface of my canvas.
To add another layer and more texture to my canvas using a stencil from my stash but also available from the shop I added texture paste over a good portion of the surface.
 
A close up of the stamping, gesso and texture paste.
 
Using the chipboard in the kit I selection the largest circle and three of the feathers. Using black paint from my collection I painted all four pieces of the chipboard.
Provided in the kit is some gold leaf which I used to decorate the surface of the black paint. How I made the pattern was using the stencil provided and my sponge I added glue to the surface then the gold leaf.
 
Getting back to my canvas to add some colour I used both of the dylusion sprays included in the kit. I first applied bubblegum pink. I sprayed the top of the canvas three times then spraying water over the top of the dylusions spray I not only diluted the pink but moved the colour down the canvas. Drying between layers I repeated this process with the vibrant turquoise.
 
Close up of the texture with the colour.
 
I painted the words day dreamer which I did cut apart with the gesso, then attached to the bottom left corner. I then attached my dream catcher to the canvas. The final step was to stamp the stamp on the white card stock provided and then cut it up and attach the words in random spots on the canvas.
 
products used that are not provided in the kit but can be found in the Shop
 
Happy Creating