Tuesday, 12 September 2017

Enjoy today and love using the expo kit 9

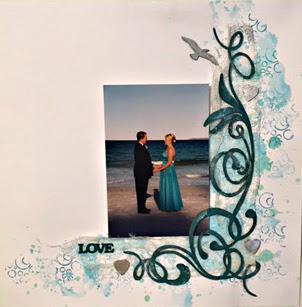
Hi Heidi here today here ive done 2 pages using this fab kit there is still lots left over to use. 
I used from this fabulous expo pack the Elisa has designed.


first I flicked some ink

 then I stamped with the bubble stamp then I put ink sprayed with water on a piece of acetate.


 then I inked the flourish and then used my own white  pearl paint.

don't forget to shop and use my discount code HW5
                                         https://www.shopandcrop.com.au/collections

Sunday, 10 September 2017

Kaisercraft September Kit

I designed two layouts for this kit and have lots of leftovers so I have two bonus layouts to show you now.


I cut up the page with all the numbers for an advent type calendar, you could add your own tiny photos on each number to get the children excited ready for the big day.

Here's my layout for this months sketch challenge, it's a beauty and I've used the September Kaisercraft Kit to create this one.  I have used some things from my stash on the background - a stencil, stamp, thickers alpha and embossing powder - these are not part of the kit.  Instead of photos I used the cut apart sheet where you can place your personal photos.


A couple of close-ups showing the stuff from my stash, the embossing is on the background and also on the photo matting.  The words across the top and bottom are from the branding strips.  You can find the kits here.
Also for a discount you can use my code SS5.


This is the sketch


That's it for me today, I hope you get inspired to think about Christmas layouts and a fabulous kit to get started.


Saturday, 9 September 2017

Using Up Your Leftovers

Good Morning,
 
Have you got sitting on your work table left overs from kits that you have brought from us? Well I am here today to share a couple of cards that I created using some of the leftovers. For my post last month I create a canvas using Expo Kit No. 8
 
This is the gorgeous layout create by Elisa that you can create with Expo Kit No. 8
 This is the canvas that I created with the kit. Click here to see my tutorial
 
This is the first card I am sharing with you, please keep reading below for a quick tutorial on how I created it.
 
In the kit was two pieces of cardstock, one was kraft and the other was white. When I created the canvas above I only used a small portion of the white cardstock so I had the whole 12x12 piece of kraft cardstock left which I cut up to create my cards.
 
The first step in my process was to cover the front and back of the cardstock with clear gesso (not supplied in kit). This was to create a surface that I could add my mediums to.
 
Using an old store card I scraped black gesso (not supplied in kit) down my card. I didn't want it perfect I wanted movement and texture.
 
I wanted to use the stamp and left over gold leaf. So I put some glue on some foam and then stamped into the foam and then on to my card three times then I spread the left over gold leaf. I think it work really well as you can read the words.


One of the left over feathers I first covered with a couple of thin layers of the white gesso (supplied) and then I went to town with the dylusions spray. Not sure how many coats I sprayed but I did dry in between layers to get the desired effect.
 
Before I attached the feather to the front of the card I splattered dylusions over the top of the card.

This is the second card I want to share with you.
This poor card started out in such a different way to what it ended up becoming.
 
Like the previous card I created I used an old store card to scrap gesso down the card surface, this time using the white gesso supplied.
 
To create my circles I actually used the circle shape that was left after I had removed all the pieces from the main 12x12 chipboard.
 
I found a small paintbrush and traced inside the circle shape onto my card. I made sure that I dried each circle as I went.
 
Using a watercolour pencil I traced around the outside of my circles and then activate it with water.
 
I hadn't planned on having a thick black border but when I was inking the edges I smudged it so then I smudged it some more.
 
I watered down some of the white gesso and created the splashed all over the surface of my card. Because the dylusions reactivates with liquid some of my spots turned blue which added to the background of my card.

The last step was to use a black ink from my stash on my stamp and then decided which words I was going to use.
 
Here is a close of up the background.

Happy Creating


Friday, 8 September 2017

Sprays.. more then one way to use them!

Hi guys!
We all have a ton of sprays in our stash right?? and that is exactly what we do with them, spray right?? Have you ever stopped and thought of other ways to use them, to get more uses from the product.
Using my Dylusions Sprays and white Gesso I am able to create some pretty colored paints, which I then used in an art journal page.
First put some dollops of white Gesso onto a non-stick craft mat and then put a squirt of ink into the Gesso and mix thoroughly 
 Then apply the paint to your project, for this page i used my spatula to scrape the paint onto the page, then dry fully.
 Once dry then go crazy with some stamping!

Another project i have been up to is playing with left overs from the expo kits,
Here is a layout i have done using one designed by Elisa.


Thanks for stopping by!
Tanya

BEACH BABE - August Crop Kit & Creating layers.

Hello there,
Here we are in September, which is Spring! A season I love, a season of color!! And speaking of color I have been creating with a fabulous Kit the AUGUST CROP KIT which can be purchased as a one off kit, which is overflowing with colorful papers and embellishments, perfect for summery layouts!

With the layout I would also like to share the steps I took to create it. I used a 10cm by 15cm landscape photo.
Things I have used that are not in the Kit were a black marker, some old cardboard or foam tape for dimension and  Dina Wakley Media Scribble Sticks which you can find in the store HERE!!!

I took the white cardstock from the Kit and this was  my back ground page.  I took the pink crayon from the Dina Wakley Scribble Sticks and I literally scribbled all over the plastic bag that the kit came in and then sprayed this with water. I took my white cardstock and dabbed it on the water color on the plastic until I was happy with the shade of pink on my back ground..  Sometimes repeating this step is necessary to get the depth of color that I am after. I let this dry naturally.
I cut a frame from Item #2839 Summer Fun, 3cms on the sides and 4cms on the top and bottom. I placed this frame on my back ground page using the yellow side. I cut a circle from Item#2840 Boardwalk using a circle template, but a small dinner plate works well too.
I then cut strips of paper to layer under my photo which was going in the middle of the circle in the middle of the page.
From Item#2839 I cut a piece 22cms by 6cms, from Item #2837 Feeling Good I cut a strip 18cms by 6cms, from Item #2837 20cms by 6cms and cut a fish tail banner on one end of each of these, ( an upside down V)
Cut a 10cms by 12cms piece of paper from Item2839. I used a black marker to edge each piece of paper.
I adhered the circle in the middle of my page, then the strips of paper overlapping slightly the longest piece of paper on the right going to the shortest piece to the left. Place the yellow piece of paper on the left of the strips under the photo. Then I used the tags and embellishments from the kit around my photo and the fabulous Thickers for my title..

Some closer views.


Beach Babe!

I remember the first time I took my daughter to the beach, she was so unsure of the waves, but once she got used to it, she loved the beach, and digging in the sand was a favorite thing to do!

I also created a fun card with some leftovers!!
Such a fabulous Kit and with summer just around the corner, pop over to the shop for your kit HERE!!!

Just before I finish this post I would like to share with you a technique I use a lot on my layouts, and that is layers.. I love to add layers, it adds dimension and interest to my pages. And it is a great way to use scraps of paper as these can be tucked under your photo for example to add to the visual effect of your page.
I have used papers from Cocoa Vanilla - Wild at Heart and you can see all the wonderful Cocoa Vanilla products in the Shop and Crop Scrapbooking Store HERE!!!!

This is what my desk looks like when I am putting a design together... (please excuse the dirty craft mat!!0
I use strips of paper that I layer over each other.  With all the Kits from the Shop and Crop Scrapbooking store you dont have to worry about whether things will match, the Kits are put together so all that worry is gone. The papers are going to either contrast or compliment each other..

After I have the design roughly put together then I adhere it to my page, and once my photo is put down I add things like fussy cut elements, flair and tags.

And here are some closer views..


I have layered some frames and stickers and papers.. The Butterflies were fussy cut from the papers.


The layers on the tag with die cuts and a flair tucked in just under the tag..


And my layout... Hello Gorgeous!!
 A good thing to remember when designing your layout is to leave white space, or parts of your layout that have no embellishing, as this gives the eye a rest especially if there are busy or heavily embellished places on the page. I hope you have been inspired to use some layers on your layouts, I am sure you will find it becomes a favorite way to scrap too..

Thanks for coming by and make sure you check out whats new in the SHOP AND CROP SCRAPBOOKING STORE HERE!!!

Until next time... Happy creating!


Monday, 4 September 2017

Winners are Grinners......

Good morning, today we are announcing last months winners I do I would like to say a very big thank you to those who entered last months Tic Tac Toe challenge your work is amazing!


 Sorry for it being a late announcement.


Honourable Mentions: 


Amy Churchward


And the winner is: 


Congratulations, can you please contact the Shop and Crop Facebook page with your Name and Email so we can organize your store voucher.


September Shop and Crop Challenge
SKETCH


Now for some inspiration, this is how the team went with the challenge......

Tamara Buckler


Kylie Symons


So why dont you give it a go, to go in the chance for a store voucher. It very simple to enter just load your take into the album here;


For your chance to win the store voucher you must load your entry into the corresponding album before Midnight 30th September 2017 (EST).

Your entry is to be exclusive to the Shop and Crop only.

Your entry be based on the challenge and not incorporated with other challenges