Showing posts with label cards. Show all posts

Thursday, 18 January 2018

Using up the leftovers

Hello everybody!
I'm loving the summer holidays, and the little bit of extra space it brings to my life. I've been making plenty of cards, and today I have two to show you that use up some pieces that I had left over from the August 2017 Cropaholic kit


For the first card I was trying to think like a scrapbooker, and cluster my elements. I used all the smallest pieces, and grouped them around a circle to give the card some structure. I spattered the card base A LOT before starting to lay out the elements. I'm still deciding how I feel about that much busyness on the background as I usually work Clean and Simple.
Here's a closer look at the card.

Next, I used a single piece of paper from the kit to be the background for a card. 


Because the rest of the card was all white, I wanted to add some interest to the paper, so I chose to do an ombre look. I used Peacock Feathers Distress Oxide to darken the top portion of the card, and white pigment ink to lighten the bottom. I love the effect this gave, and will definitely be doing it again.

Finally, a quick look at (some of) the aftermath. Does anybody else's desk look like this when their done with crafting? I guess I know what I'll be doing next! 

If you are interested in seeing more cards, you can find me on Instagram.
We'd love to see what you've made with your leftovers, so share any projects you have in the Facebook groups.
I look forward to creating for you again!
Blessings,
Donna

Saturday, 18 November 2017

November Mood Board and Christmas tags

Hello again! Donna here, and I’m excited to share with you what I’ve made with the November mood board.

I smooshed Distress inks onto watercolour paper to create the background, building up the layers until I was happy with the result. This background could easily be made using Distress oxides too.

I then stamped the leaf three times on white card stock before heat embossing the with gold. I fussy cut the leaves leaving just a tiny margin of white around the outside.


I tore some vellum into pieces to mount each of the leaves onto. I love the look of torn edges. Once I had glued the leaves onto the vellum, I put a little glue on the back of the vellum only where the leaves were because the glue shows through vellum and can wreck the look. I glued these to the card, starting in the centre.


So, are you going to enter the November mood board challenge? It's such a beautiful board, it seems a shame to miss out! Don't forget you can win a store voucher if you're the winner. 
Share your entries here.


Next, I have some very simple Christmas tags for you. So many of the Christmas packs have Ephemera and die cut shapes, and I've used these to make some tags. I cut the tags using a die, and layered greetings and pictures on top, sometimes popping part of the image up with foam tape. Here's a look at the set of tags.


Here are some close ups of the tags. You can see the dimension in the tag below, created by raising the top berries.


This Santa's face made me laugh. He looks completely frazzled and overworked, but he's pressing on!


This tree took the whole tag, and then some, but I like the way it hangs over the edge.


It's always a pleasure to share with you what I've been up to, and I hope you are inspired to get crafty, either with the mood board, or making some Christmas tags.
Until next time, may you enjoy the approaching Christmas season,
Blessings, 

Donna 
Instagram: donnadoll74


Thursday, 19 October 2017

Spiring sunshine

Hello!
It's Donna here, celebrating the fact that the sun has made it all the way to Victoria, and I finally have some sunny days to enjoy!
I've made two spring inspired cards to celebrate.
I've used the lovely papers in the September Cropaholic Kit from Jillibean Soup.

This first card has a splash of Distress Oxide which I loosely painted onto white cardstock, then spattered on some more for good measure!
Onto this I adhered some flowers and leaves from the cutout sheet, cutting one of the bigger flowers in half ( I used the other half at the bottom of the page as a small tag) I used a sentiment from my stash, and some black and white striped paper from an earlier kit.


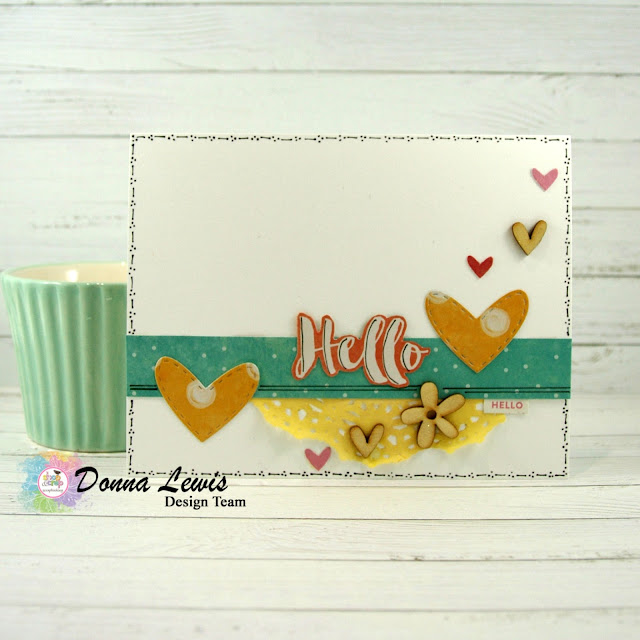
The second card has a mix of elements, all from different parts of the kit. The yellow hearts are the leftovers from an earlier shaker card that I made using the kit. The sentiment was cut from one of the papers, and highlighted with a black pen. I used a doily, which I coloured with Distress Ink.
I adhered the hearts so they appear to be floating off the page.

I hope that these cards give you some ideas so that you can make the most of your kits.

Until next time, may your days be sunny.
Blessings,

Donna
instagram donnadoll74

Friday, 13 October 2017

Lilac Whisper Collection - KaiserCraft

Hello All, its Deena with you on the blog today.

I always love receiving my design team parcel because I never know what's inside, Kylie keeps us all on our toes. One of the bags inside my box held papers and collectables from the KaiserCraft range - Lilac Whisper. It's such a pretty range. Also in the bag was a distress spray stain - milled lavender and paper flowers - coconut.
 
 
When I first say this piece of paper I knew that I needed to enhance the shapes in that top corner and make the card a simple one.
 
The paper that is cut in a circle is the other side of the paper above, how gorgeous are both sides, hard to choose which one to use. The background of this card was created by spraying my mat with the distress stain then stamping my acrylic block into it and smooshing it onto my cardstock, I didn't think the colour was quite right so I used a little bit of watered down gesso and used the same method. I made sure that I dried in between the two layers of wet medium although I probably didn't need to.
 
For this card I used the lilac whisper cardstock and one of the collectables and the distress spray stain but I also used some yummy iridescent creative medium from imagine crafts, and a Scrap Fx stencil - Ripple.
 
For the next couple of cards I really dipped into the mixed media supplies that are sold in the shop.
 
 
 I have to confess when I first received my scribble sticks and played with them I did not like them at all, but this time I gave them more of a chance and created this vibrant background using magenta and blackberry.
To create the two backgrounds I first laid a layer of gesso on my cardstock and while it was still wet I stamped into it with my textured script stamp (has to be one of my favourite stamps I used it on almost everything I create). I them dried my gesso, you really couldn't see the impression of the stamp but once I add the scribble sticks it came to life.
For I little trick that I used - scribble sticks are not permanent, they move with water even after they are dry, so I careful and gentle added a layer of matte medium over the top and now I can add anything I like over the top because the colour is not going to reactivate.
My last step was to add texture with my modeling paste and stencil.
 

Once my texture paste was dry I scribbled night over the top of the paste which I activate with water. Once dry I them added a layer of white gesso over the top using a dry brush. Again using my script stamp I stamp the image in black ink. The next layer was my chipboard which I heat embossed and them added the butterflies from the collectables.

Here is a close up of the card.

Happy Creating


Thursday, 5 October 2017

Reflections - shaker cards

Hi everybody,
It's Donna here with some more cards using the Jillibean Soup paper that were in the September Cropaholic kit.

The theme for this month's challenge is Reflections, and looking at our favourite projects. I chose this card that I made about a month and a half ago because I love it, and because it highlights one of my favourite things- shaker cards. Here is the card I'm talking about.


In this post I have also included a detailed how-to for making your own shaker cards or elements in your scrapbooking pages. 

I have below a picture of all the elements I used to make another shaker card below. The only things not pictured are clear plastic, like the plastic that the kits come in, and adhesive tape. The important thing here is the rectangular white piece with a square cut out of it. You can make any shape shaker, like the small hearts which are all individual shakers in the card above. If you have a cutting machine, this step is easy, but the same effect can be made by carefully cutting a hole out with scissors.

First I attached the frame to the front of the card. This is optional, but I thought for this card, the pop of green would stop the card from being too pink all over.
 Next, on the back of the panel, I laid down some adhesive tape (glue would be just as good) and cut a piece of plastic to just larger than the cutout window and laid it on top. If you look carefully, you can see the clear plastic in the photo below.
Once the plastic was in place, I added the next layer of adhesive. This time it was foam tape. You can do two layers if the bits that you want to shake around are thicker, as they were in the heart shaker card. The important thing is to not leave any gaps around the window, because the sequins will escape if you do! I had to be especially careful in this case, because the sequins, which come from my stash, are tiny, and also because the You are Amazing panel was only just bigger than the window.


I added some sequins to the middle of the window, then peeled off the middle tape, and placed the You are Amazing panel face down on the window. I then added a little more flat tape to the middle section.

Next, I peeled off all the backing and stuck the shaker element to my card, which was exactly the same size as the shaker panel.
 Finally, I added the flamingos and flowers to complete the card, using a mix of flat and dimensional adhesive tapes.
 Finally, here is the completed card.

Until next time, may you know how amazing you are,

Blessings,
Donna
@donnadoll74

Wednesday, 13 September 2017

Paperific cards

Hello everybody! It's Donna here and I have such a lot to show you today. I had a great time at the Paperific Expo! Can you believe it was that the first time that I met my bosses, Kylie and Darryl! Aren't they lovely? I also got to meet some other members of the Design Team, and watch Deena make some lovely mixed media pieces. Isn't it wonderful that the design team have such different skill sets? I loved learning from her. It was also great to meet some of the subscribers to the kits and blog, so hello to those of you I met there!

One of the things that I got to do at Paperific was play with one of the Shop and Crop Kits, and make cards over the weekend. I ran out of time before I ran out of ideas and paper, but i thought I'd show you what i got up to.
I brought in a little box of goodies to Paperific from home that included things that I thought anybody would have at home, which included glue, scissors, a few sequins and some extra white cardstock to use as card bases. Other than this, all the cards were made using the contents of the kit, with the exception of the blue watercolour background in the card above, which was made by smooshing distress ink onto watercolour paper.
If you have purchased this kit and have some leftovers, I'm sure you'll find some ideas here for your extra pieces.


Many of the cards here were based around the 12" x 12" sticker sheet, as well as one of the papers that could be cut apart to make many of the panels for the cards.

This card also used a little of the Nuvo shimmer mousse from Expo kit 4 which Deena had out on the table. It was too yummy to leave alone. 

I love the sentiment on this next card. Isn't this what life should be about? Sometimes it's easier to say than to put into practice though.

This next card has a special story behind it. I had a little friend come and sit at the demo table and chat with me while I made it. She helped choose colours and do little jobs like peeling the backing off the papers while she and I and her mum chatted. So a big hello to Ruby, who is 3-and-a-half, and who is great company.


Some of the cards, like the one below were very quick and easy. This one only needed some thread, and the little tag and sequins, because the Wild and Free panel was so gorgeous that I didn't want to overpower it.

The Shop and Crop Kits aren't just for for Scrapbooking. What else do you use them for? We'd love to see. 

The kits are available either as a subscription, which gives you a saving each month, or as a one off, until stocks run out. If you'd like a further saving, just use the code DL5 to give you an extra $5 off. This discount will also work on other products, including the the Distress Oxides ( set 1 ) which are being ordered into the shop at the moment. With your discount code DL5, they will be only $95 for all 12!
Until next time, happy crafting. May your days full of great conversations and your hearts full of what's important!
Feel free to have a peek at my other cards if you are interested.
Donna


Saturday, 9 September 2017

Using Up Your Leftovers

Good Morning,
 
Have you got sitting on your work table left overs from kits that you have brought from us? Well I am here today to share a couple of cards that I created using some of the leftovers. For my post last month I create a canvas using Expo Kit No. 8
 
This is the gorgeous layout create by Elisa that you can create with Expo Kit No. 8
 This is the canvas that I created with the kit. Click here to see my tutorial
 
This is the first card I am sharing with you, please keep reading below for a quick tutorial on how I created it.
 
In the kit was two pieces of cardstock, one was kraft and the other was white. When I created the canvas above I only used a small portion of the white cardstock so I had the whole 12x12 piece of kraft cardstock left which I cut up to create my cards.
 
The first step in my process was to cover the front and back of the cardstock with clear gesso (not supplied in kit). This was to create a surface that I could add my mediums to.
 
Using an old store card I scraped black gesso (not supplied in kit) down my card. I didn't want it perfect I wanted movement and texture.
 
I wanted to use the stamp and left over gold leaf. So I put some glue on some foam and then stamped into the foam and then on to my card three times then I spread the left over gold leaf. I think it work really well as you can read the words.


One of the left over feathers I first covered with a couple of thin layers of the white gesso (supplied) and then I went to town with the dylusions spray. Not sure how many coats I sprayed but I did dry in between layers to get the desired effect.
 
Before I attached the feather to the front of the card I splattered dylusions over the top of the card.

This is the second card I want to share with you.
This poor card started out in such a different way to what it ended up becoming.
 
Like the previous card I created I used an old store card to scrap gesso down the card surface, this time using the white gesso supplied.
 
To create my circles I actually used the circle shape that was left after I had removed all the pieces from the main 12x12 chipboard.
 
I found a small paintbrush and traced inside the circle shape onto my card. I made sure that I dried each circle as I went.
 
Using a watercolour pencil I traced around the outside of my circles and then activate it with water.
 
I hadn't planned on having a thick black border but when I was inking the edges I smudged it so then I smudged it some more.
 
I watered down some of the white gesso and created the splashed all over the surface of my card. Because the dylusions reactivates with liquid some of my spots turned blue which added to the background of my card.

The last step was to use a black ink from my stash on my stamp and then decided which words I was going to use.
 
Here is a close of up the background.

Happy Creating